Buying a Japan eSIM on Klook is easy – but knowing what to do after purchase can be confusing.
In this article, I’ll show you how I actually bought a Klook Japan eSIM, step by step, up to the activation screen.
Tip:
Having the Klook app installed makes it easier to find your eSIM details later.
Step 1: Check eSIM Support
Before buying a Japan eSIM on Klook, make sure your phone:
- Supports eSIM
- Is unlocked
Step 2: Choose Your Japan eSIM Plan on Klook
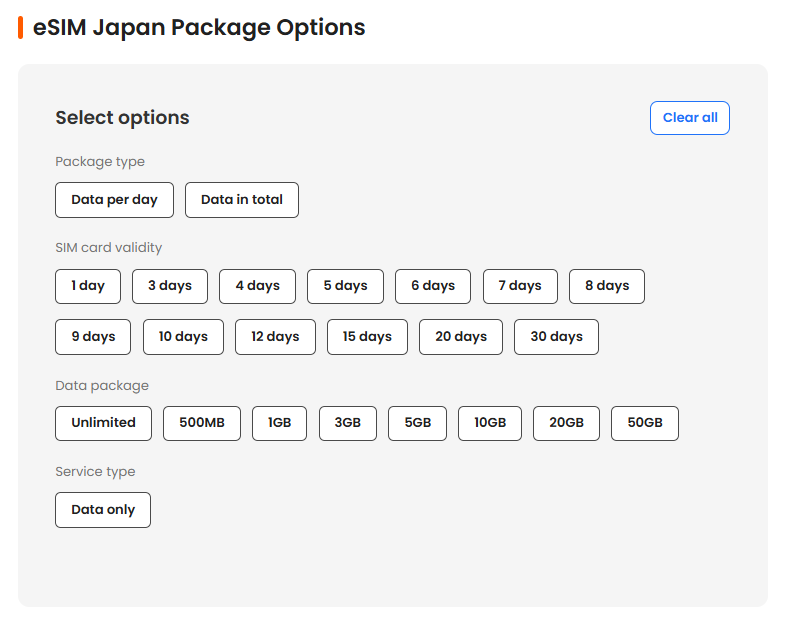
Search for Japan eSIM on Klook and choose a plan based on:
- Length of stay (make sure it covers your entire trip)
- Data amount (choose based on how you plan to use your phone)
If you’re not sure how much data you actually need, this guide breaks it down in a simple way:

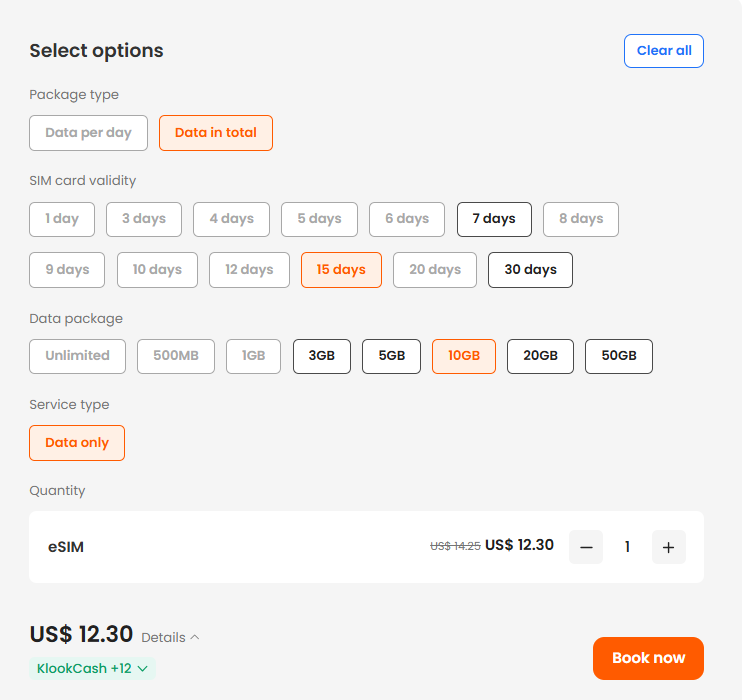
Step 3: Purchase & Payment — What Happens After Checkout
After selecting your Japan eSIM plan on Klook, complete the checkout and payment process.
This is the plan I personally chose for my trip.
It worked well for my travel style, but your ideal plan may be different depending on how long you stay and how much data you use.
Once payment is successful, here’s what happens:
- You’ll see a booking confirmation screen while your order is being processed
- A confirmation email with your voucher will be sent to you
- Your eSIM booking details will appear in the Klook app
Step 4: Open Your Voucher & Check Your eSIM Details
After completing your purchase on Klook, open the confirmation email and click “See voucher.”
This voucher contains:
- Plan name (e.g. 5GB eSIM Japan)
- Package type (data plan)
- Validity (how long the voucher is valid)
- Hotspot sharing (whether tethering is supported)
- Booking reference ID
Voucher validity
Your voucher is valid for 180 days from the booking confirmation date.
This does not mean your data starts immediately — it simply gives you time to activate the eSIM later.
Hotspot sharing
If hotspot sharing is listed as Yes, you can share your mobile data with other devices.
This is helpful if you need internet on a laptop or are traveling with someone else.
Just keep in mind that hotspot use can consume data faster.
Step 5: Install Your eSIM on Your Phone (Before Your Trip)
In the Klook app, you’ll see a message that says:
We recommend you activate it a day in advance.
This means installing the eSIM on your phone ahead of time, so everything is ready before you travel.
Your data usage does not start during this step.
According to Klook’s instructions, your plan starts when data usage is detected in your destination.
- Where to find your eSIM in the Klook app
- Open the Klook app
- Go to Account → Bookings
- Select your Japan eSIM
- Tap “Activate” (Installation process)
When you tap “Activate”, Klook begins the process of installing the eSIM profile on your phone.

You may see a reminder screen with notes such as:
- the eSIM validity period starts when data usage is detected at your destination
- each eSIM can be used on only one device
- stay on this page while your eSIM is being activated
- make sure to activate the eSIM before the end of the validity period
- eSIM is activating
After tapping Activate, you’ll see a message like: “eSIM is activating”
Keep the app open and wait while the installation continues.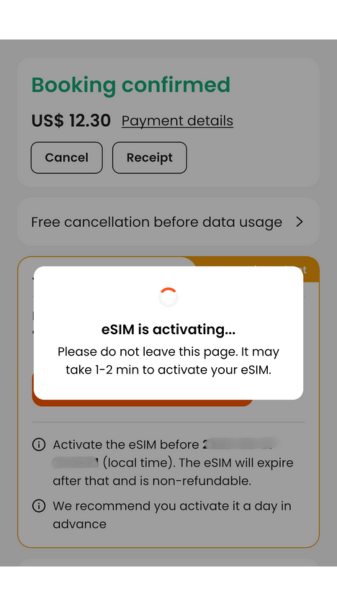
- iPhone activation screens
During the process, your iPhone may display system messages such as:
- “iPhone will share your EID with the carrier to activate your eSIM.”
- “iPhone may temporarily connect to a network to do this.”
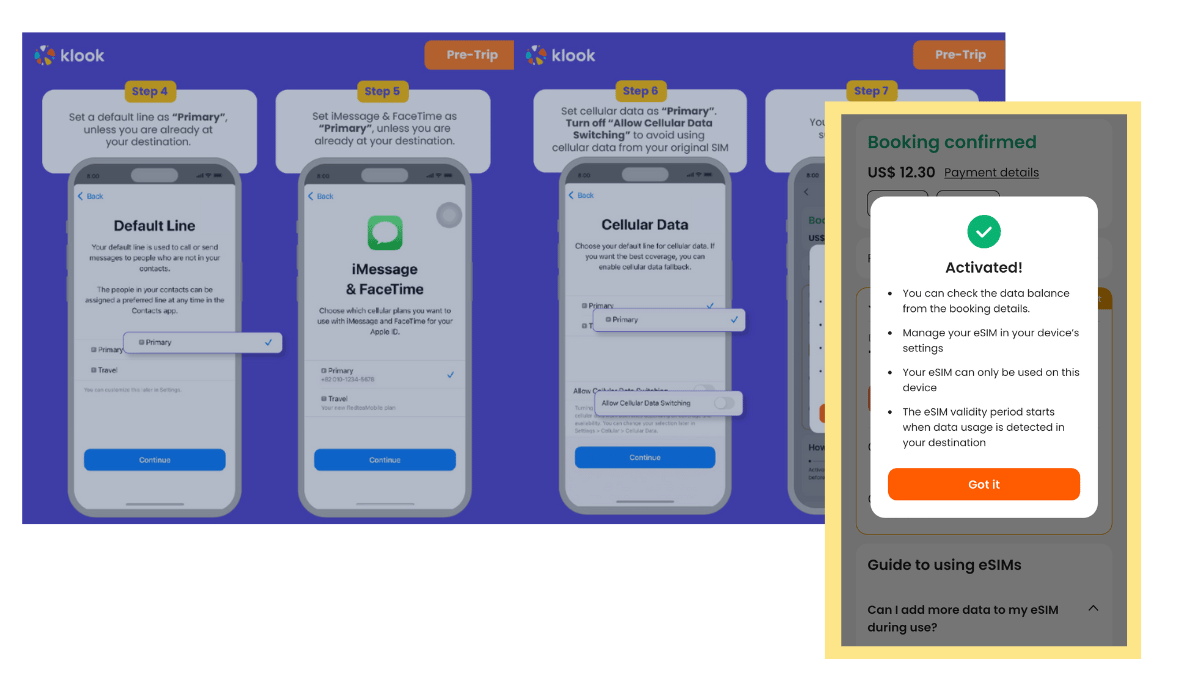
- Activated!
Once installation is complete, you’ll see an “Activated!” message.
On my iPhone, the setup skipped the “Default Line” screen shown in Klook’s instructions and went straight to the confirmation screen. This can happen depending on your iPhone settings
Step 6: After Installing the eSIM: Check These Pre-Trip Settings (iPhone)
If the default line setup doesn’t appear during installation, check these settings manually to avoid roaming or extra charges.
These are done in your iPhone’s Settings — not in the Klook app.
Path on iPhone:
Settings → Cellular (or Mobile Data)
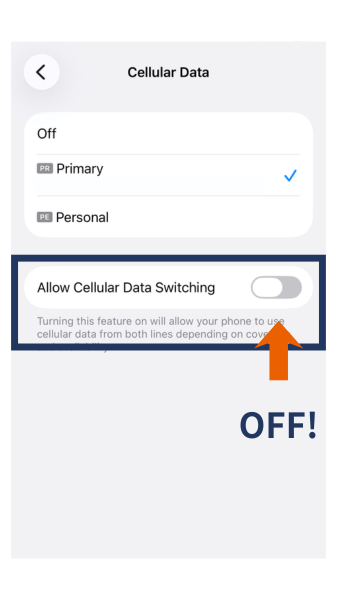
Set Your Default Line as “Primary”
Keep “Allow Cellular Data Switching” turned OFF.
This helps prevent unintended roaming or extra charges before your trip.
What to do after landing in Japan (iPhone)
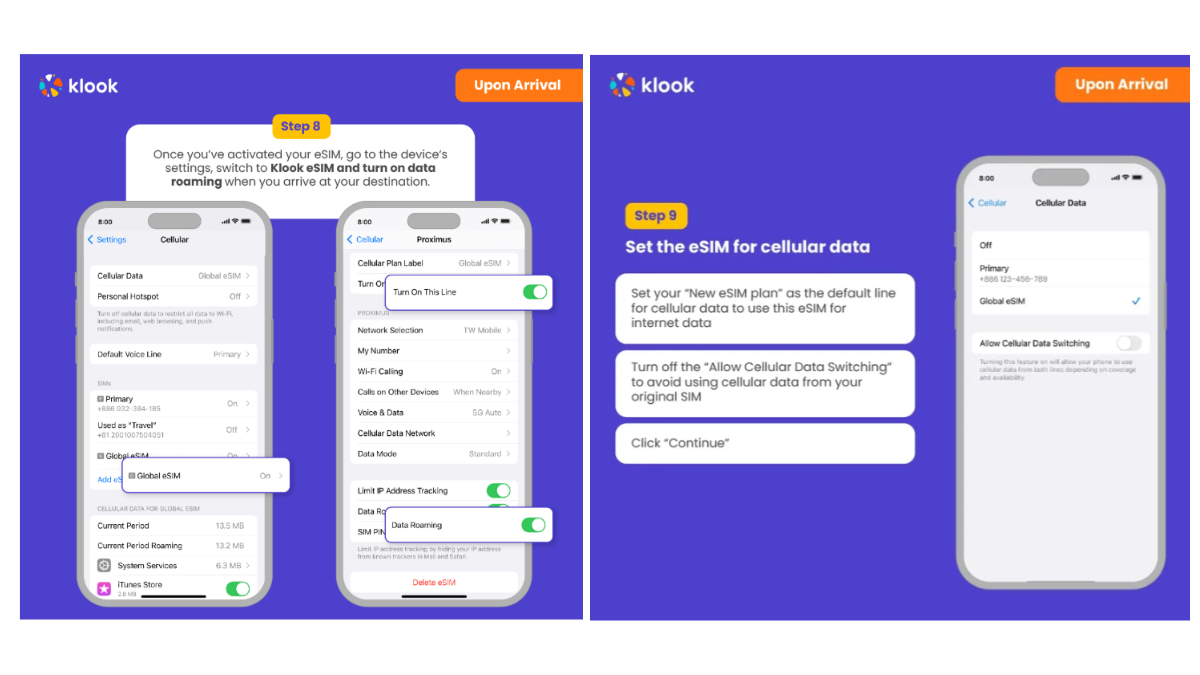
Follow Klook’s official instructions below to activate your eSIM once you arrive in Japan.
- Open Settings → Cellular (or Mobile Data)
- Under Cellular Data, select your eSIM (Travel / Global eSIM)
- Turn Data Roaming ON for the eSIM
- Keep your Primary line as the default for calls and messages (recommended by Klook)
⚠️ My personal tip (to avoid U.S. roaming charges)
When I turned off Airplane Mode after landing in Japan, I immediately received a roaming alert from my U.S. carrier (e.g. “$XX/day”).
To completely avoid roaming charges, I personally:
- Turned OFF my Primary (U.S.) line
- Used only the activated eSIM for cellular data during my stay
This setup worked perfectly for me and kept things stress-free.
If your data doesn’t connect right away
Try the following:
- Toggle Airplane Mode ON → OFF
- Restart your iPhone
- Confirm Cellular Data is set to the eSIM
- Make sure Data Roaming is ON for the eSIM
iMessage vs SMS when using an eSIM in Japan
iMessage (Works)
iMessage works as long as you have an internet connection.
- iMessage uses data (Wi-Fi or eSIM)
- Messages sent to your Apple ID will be delivered normally
- In my case, iMessage worked without any issues while using the eSIM in Japan
SMS (Regular text messages)
Regular SMS messages usually do NOT come through if your Primary line is turned OFF.
- SMS depends on your phone number and carrier network
- When the Primary (U.S.) line is OFF, the carrier cannot deliver SMS
- This is normal and does not mean your eSIM is set up incorrectly
In my case, I could not receive SMS while using only the eSIM — which was expected.
Important note
If you need to receive SMS (for example, bank verification codes or one-time passwords):
- Keep your Primary line ON
- Be aware that this may trigger international roaming charges
To completely avoid roaming charges, I personally kept my Primary line OFF and relied on:
- iMessage
- Apps and email for verification instead
Summary: How to Use a Klook Japan eSIM
Using a Japan eSIM from Klook is simple once you understand the flow.
The 3-step process to remember
- Buy the eSIM
Purchase your Japan eSIM in advance and confirm your voucher details. - Install the eSIM (before your trip)
Use the Klook app to install the eSIM on your phone.
This prepares your device but does not start data usage. - Activate the eSIM (after arrival in Japan)
Once you arrive, switch your cellular data to the eSIM and turn on data roaming.
This is when your data plan actually begins.
If something looks different from the screenshots or instructions, don’t panic.
As long as your eSIM is installed and you switch to it after arrival, you’re on the right track.
Ready to move forward?
If you’ve decided that Klook eSIM Japan feels right for your trip,
you can check the current plans and details here.
*This post contains affiliate links.
If you make a purchase through them, we may earn a commission at no extra cost to you.
Related Guides for Using eSIM in Japan
How much data do you need for eSIM in Japan?
Is Klook eSIM Japan worth it?
How to Check If Your Phone Supports eSIM (Before Buying)