If you’re traveling to Japan soon and wondering how to make your trip smoother, one powerful yet often overlooked tool is Amazon Japan.
Especially if you already know what you want to buy — whether it’s a specific travel item, Japanese gadget, or a local favorite — using Amazon Japan can save you the time and hassle of hunting it down in stores after you arrive. It’s a smart way to be prepared before you even set foot in the country.
In this guide, we’ll walk you through how Amazon Japan differs from the U.S. version, how to register, ship items to your accommodation or a locker, and even how to use a free Prime trial — all in English!
Amazon Japan vs. Amazon US – What’s Different?
Before you start shopping, there are two important things to know:
1.The Website Address Is Different
Amazon Japan has its own website.
This is completely separate from Amazon US, even though they may look similar.
2.Your Amazon US Account Won’t Work Here
Your Amazon.com login and password do not carry over to Amazon Japan.
You’ll need to create a new account specifically for Amazon Japan, even if you already have one in the U.S.
Amazon Japan also offers a free Prime trial — perfect for short-term visitors.
(For details and timing tips, see the end of this article.)
Getting Started: How to Create an Amazon Japan Account
Creating an Amazon Japan account may sound intimidating at first — especially if you’re worried about the language barrier or unfamiliar systems. But don’t worry! Here’s a clear, simple guide to help you through the process.
- Visit the Right Website
This is the official Amazon Japan website. You might notice that most of the page is in Japanese at first.
You might also see a screen asking you to type in a few letters shown in an image — like this one:
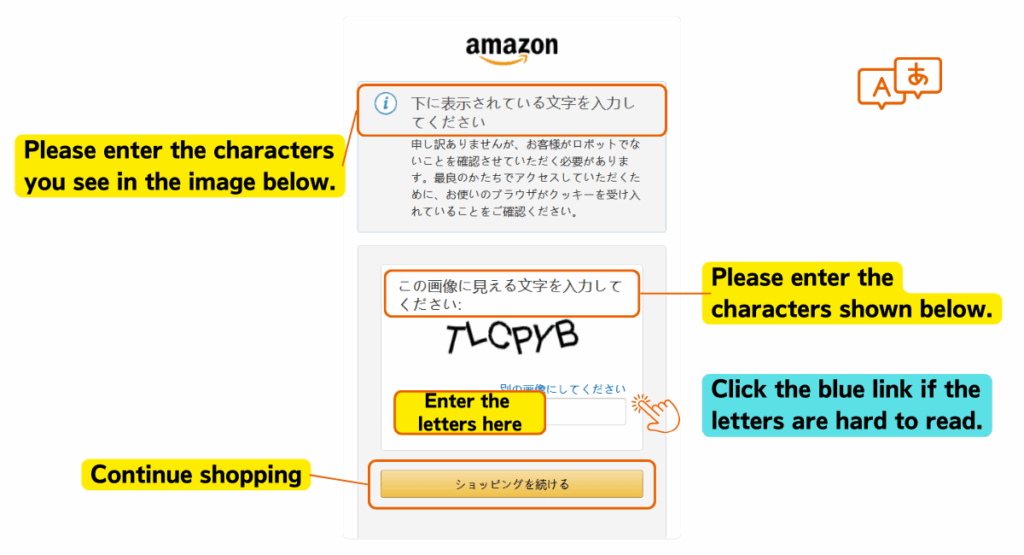
If this screen appears, don’t worry — it’s just a quick security check to keep your account safe.
This is called a CAPTCHA, and it’s just Amazon’s way of checking that you’re a real person, not a robot.
Just carefully type the letters you see into the box and click the yellow button to continue.
If the letters are hard to read, you can click the blue link below the image to get a new one. - Switch the Language to English
To make things easier, you can switch the website to English.
Look at the top-right corner of the screen. Click the flag icon (or it may say “JP”).
Choose “English – EN” from the dropdown menu.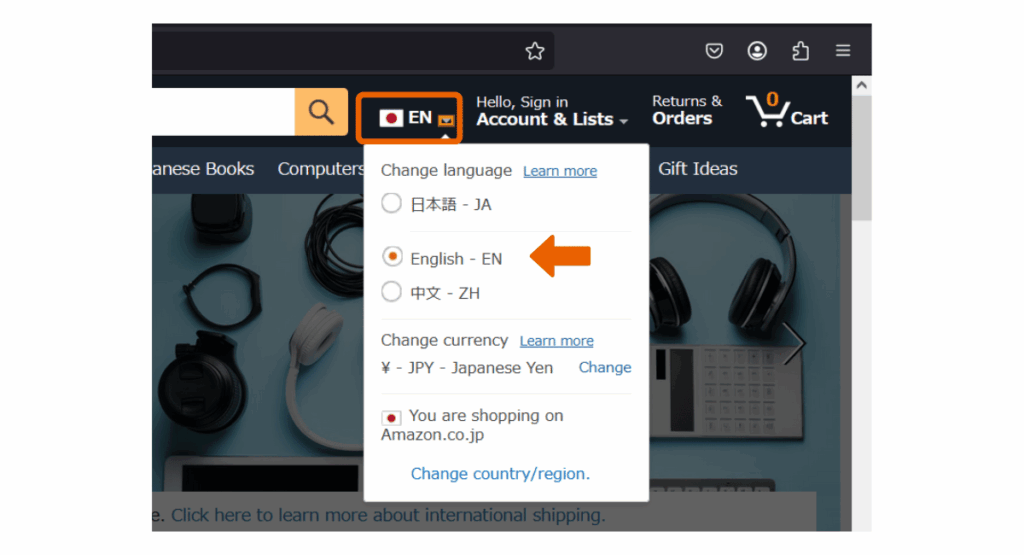
Note: Not all text will be translated, but menus and buttons will mostly be in English. You can also use Google Chrome with automatic translation to help with the rest.
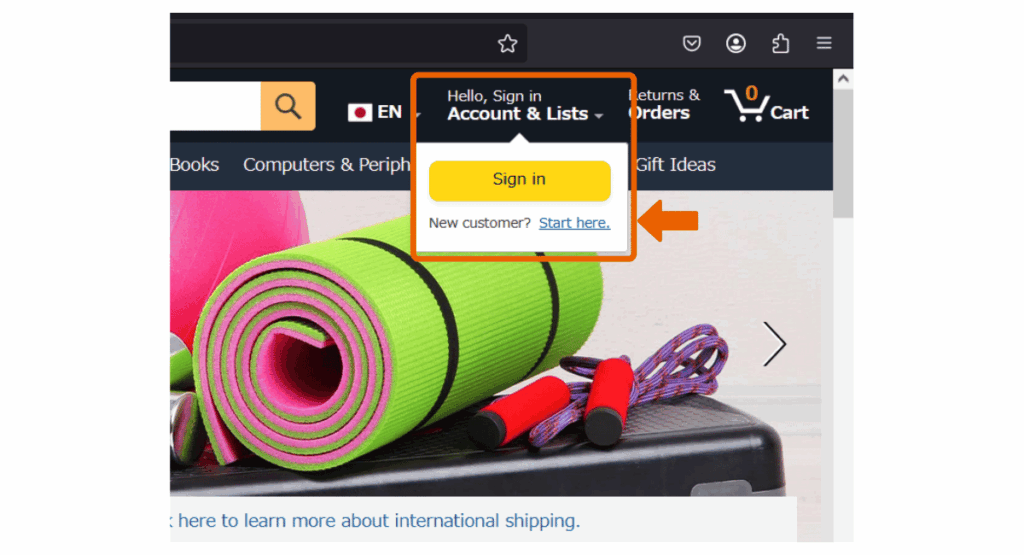
- Create Your Account
Select “Start here” next to “New customer?”
Fill in the following:
- Your name (it can be in English)
- Your email address
- Create a password
- Re-enter the password
Click “Create your Amazon account“
If you see a “Continue” button instead of “Create your Amazon account,” don’t worry – this usually means that Amazon will guide you through one or two extra steps to confirm your email address. You might receive a 6-digit code in your email. Just enter the code when asked, and your registration will continue. This is normal and part of Amazon’s security process to keep your account safe.
- Add a Payment Method
You can use most international credit cards.
- Go to “Accounts & Lists” > “Your Account”> “Payment Options”
- Add your card info (Visa, Mastercard, etc.)
- You can leave the billing address as your U.S. address.
How to Ship Items to Your Hotel or an Amazon Locker in Japan
Once your account is ready, it’s time to shop and choose where to send your items.
Amazon Japan makes it easy to deliver packages directly to your hotel or to a nearby Amazon Locker (called “Amazon Hub Locker” in Japan).
Let’s look at both options and how to use them safely.
Option 1: Shipping to Your Hotel or Accommodation

What You Need:
- The full Japanese address of your hotel (usually available in your booking confirmation)
- Hotel’s phone number (optional)
- Your reservation name (important!)
- Your check-in date
Steps:
- Go to “Accounts & Lists” > “Your Account”> “Your Addresses”
- Click “Add Address”
- Enter the hotel’s address in Japanese (you can copy & paste from the booking website)
- In the “Name” field, write something like:
Your Name / Guest arriving [Your Check-in Date]
Example:John Smith / Guest arriving April 15
Tips:
- Contact the hotel in advance to let them know you’re expecting a package.
- Make sure the arrival date of the package is within 1–2 days of your check-in.
- Try to use Amazon Prime shipping for faster delivery.
Option 2: Using an Amazon Hub Locker (Amazon Box)
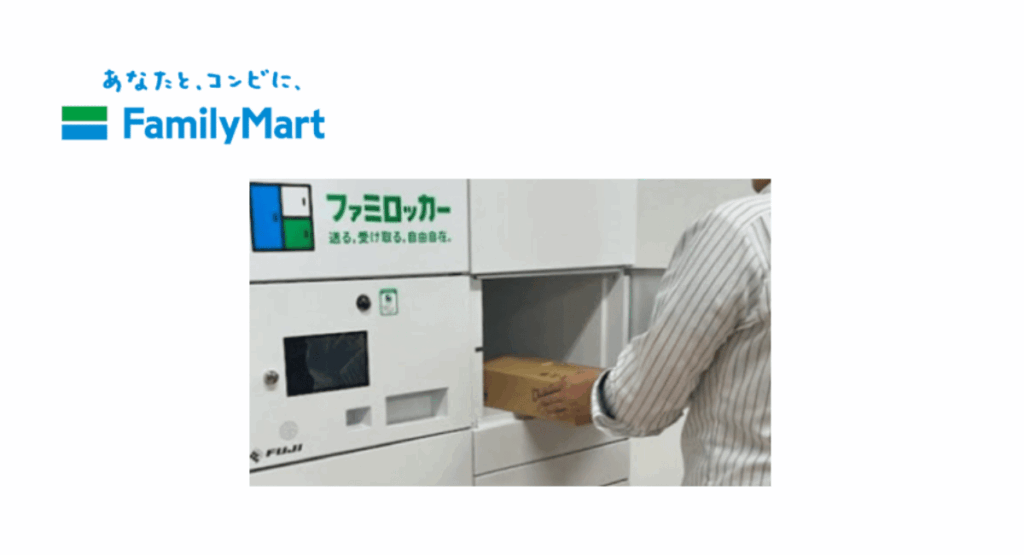
If you don’t want to bother the hotel staff — or if you’re staying in multiple places — an Amazon Locker is a great solution.
What is an Amazon Locker?
It’s a secure, self-service box where you can pick up your package using a code.
They are often located in:
- Convenience stores (like Family Mart)
- Train stations
- Shopping malls
How to Use It:
- When you check out on Amazon Japan, go to the delivery address section
- Click on “Search for a Pickup Location”
- Type in the name of your city or station (e.g., Shinjuku, Kyoto Station)
- Choose a nearby locker from the map/list
- After purchase, Amazon will send you:
- A pickup code
- A QR code (if available)
When your item arrives:
- Go to the locker location
- Enter the code or scan the QR code
- The locker will open automatically
You usually have 3–4 days to pick up your item, so be sure to time your order right.
Planning to Use Amazon in Japan?
Preparing for a trip to Japan? Don’t waste time searching for things after you arrive — let Amazon Japan bring them to you.
Tips:
Amazon Japan’s free Prime trial is super useful during your trip to Japan — for faster shipping, free delivery, and access to Prime-only deals.
But since Prime benefits are only available within Japan, we recommend starting your free trial just before or right after you arrive in the country.
Also, don’t forget to cancel your trial within 30 days if you don’t plan to continue — otherwise, it will automatically switch to a paid membership.
🎁 Start Your 30-Day Free Trial Today
If you’re new to Amazon Japan, you can enjoy a 30-day free trial of Prime!
During your trial, you can enjoy Free shipping, Prime Video,
Prime Music, and much more.